Sunday, February 26

Begining Ballerina

 I love my nieces and nephew, if you have read anything that I have written, that is pretty obvious. I mention them all the time, I just think of them so often, and I have loved sharing special moments with them. Many of those moments often involve creative pursuits. I have always drawn and written little things at their request. I have let them explore art by using any of my cached supplies (some still fully useable since I got them in high-school) to encourage their creativity. And I have a lot of trouble saying no to their requests. Enter my youngest sister's little one, who upon learning I was making dolls, asked me "can you make me a ballerina?". Not one to say no, I answered, "of course I can". I had no idea how I would do it, but my challenge was set.


 If you have seen any of my other painted faces, you will know that I have been struggling to find my way to make appealing faces for my dolls using the style of painting I have always used.  Somehow, many of my faces were looking very harsh, almost mean, and I knew I wanted a much more 'sweet' looking face for this ballerina.  I started drawing and painting, and suddenly, there she was. The face above is suitably doll like, the big eyes are exactly what I want, and leaving off eyebrows means that I avoid the mean looking problem.  But something was whispering in the back of my mind, something started to look very familiar about this face, and then I realized what it was. This face, to me, resembles a Blythe Doll.  This is my own style, but it is sort of a morph I think, likely from my general adoration of the Blythe Doll look. Obviously, this is a flat single dimensional painting, and done on flannel to boot, so it is really startling to me that the shading makes me think Blythe.


 I started with this head by backing a large piece of flannel to it, and stitching closely around the edge of my face. I have no idea what I am doing here really. I know it will need hair at some point and I am still exploring how that is going to work, but I left a large folded flap in the back of the head so that I can sort out the hair and stuffing later.


 The face is so sweet for this ballerina, I really love the way it looks, even bald as it is. Below you can see a few images of the back of the head, the folded flap I left until I can sort out how I want to make her hair, and I also did a shot of the open flap so you can see how simple the construction is. This, of course, had to be hand sewn, as I didn't want to even risk an accidental stitch into the face area.


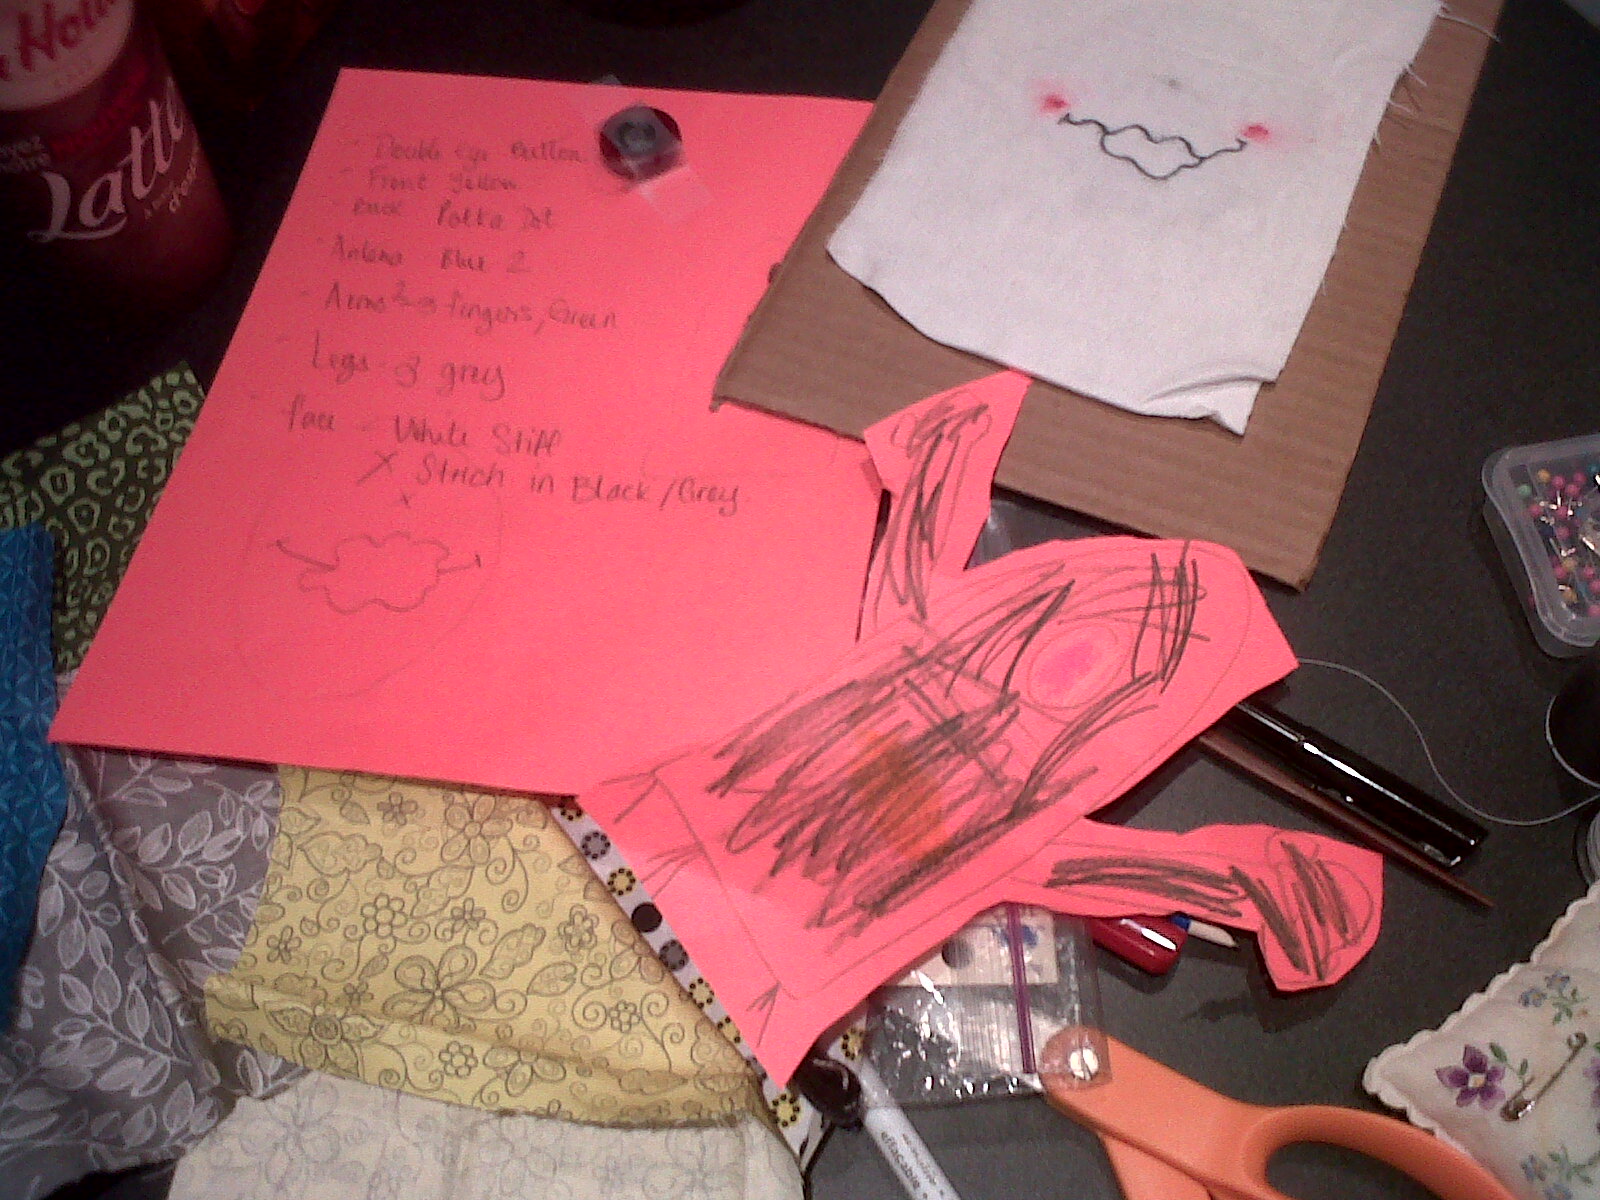
Head done, I now had to imagine how the heck I was going to do a body for this doll. Again, no clue what I am doing as I have never so much as seen a finished art doll up close, and never sewn anything other than my pillow like Stuffies.  I just decided to try a few shapes out. I made a template, and as I was drawing it, I made separate arms and legs almost as a habit. Below you can see my improvised body plan. I realized it would look rather silly to stitch the limbs into the main body, and not very dancer like, so I realized I can attach them with a sort of button joint, even if it is just for looks. I don't really know how button joints work, but I figure there must be some information somewhere online. That would come later.


So I cut out my template pieces, traced them on to white flannel, thinking they were just test pieces anyways, and started to hand sew the pieces with a heavy button thread, just to get an idea of their scale and to see if they would even work together at all.


 First came the torso, and gosh it was almost impossible to turn out after sewing, that is one small neck opening. I may be a total newbie at this, but I usually think ahead better, I managed to get it turned out finally and was really surprised to see that the curve of the waist was really nice, not too sexy, not too boyish, perfect really for a little ballerina. Maybe I can manage this after all.


 After looking at the white flannel blank for the test run, I wasn't sure where to go next. Do I use it as a model form, do I embroider it? I decided to try painting on the flannel, and found that even once it has been sewn, though a little challenging, it still took the paint and some shading nicely. I was quite happy with how it looked. I think painting it after stuffing might work better.


 I decided to work on the legs next, creating the two identical limbs with white flannel, stuffing them with PolyFil, and then painting some little pink ballet slippers onto the "feet". As i mix all my paint colours by hand from a basic set, there is always  little variations in colour from place to place, it's just the way I mix, but somehow it looks right to me. I don't like completely solid blocks of colour, if I wanted that, I could just buy the specific colour in some crafting paint bottle. I like to think of everything as a canvas and approach it like I would a large scale original piece of art, the shading is what gives it depth.


I roughly assembled the pieces into place with some pins, just to see how it might look all together and I have to say, it was love at first sight. Even with no hair, no arms, and no clothing, I am in love with this doll. How will I ever let her go?


 Here is another couple looks at the partially assembled art doll, I can't believe how cute she is. I really love that her legs look so long, and the way they sort of sit on her hips is very charming to me.  I really hope I can sort out the whole "Button Joint" thing, and decide how to go about making hair out of yarn, in order to make her really come to life. For now she is watching over me as I blog, making sure I am always thinking of her.


This doll is taking a lot more time then I imagined to it would, but I suppose that it what makes it special. I am completely hand sewing the pieces, since they are so small and there is little room for error at all. I need to stuff them very densely so that they are easier to paint and hold their shape well. I am experimenting with using both PolyFil fibre stuffing and PolyFil bead stuffing with this doll. I want to give it a little more weigh but also, adding beads to the knee and elbow areas make them just a little more 'pose-able', I think with gentle play they will hold up nicely, and also the doll would be nice to photograph. A dancer must be able to move a little bit after all.


I just started my next step, the arms, which are a little more primitive than I would have liked, but I just don't have the skill or the tools to make tiny little fingers and still be able to turn the doll out and then stuff all those tiny areas. I literally use a set of Mahogany chop sticks that I had in my kitchen to do the stuffing, so it is a very difficult thing to get it all the way down and into the tiny thumb on the arm.  I will leave things here for now, since this has already been a two day process on this doll, I will update her as she begins to come together.  I want to test out some ideas I have for the hair, and also need to figure out how the heck I can make clothing for her. I have never ever sewn anything like clothes at all, so I am completely at a loss when it comes to making a Tutu. Wish me luck.

Bunny Boo Who?

 My latest Stuffie is a sort of bunny creature, I wanted to try to make a pattern for myself again, and had actually planned on making a pair of these, but so far have only managed "Peachie" Bunny Boo. Here is the process thus far.


 I started by adding Stiffy, yes that is what it is called, to cut-out fabric circles. These are my basic faces, the style I like to use, but I stiffen the fabric to make it easier to work with. It makes embroidery easier, although it makes turning out the completed doll structure difficult.


 I chose a selection of matching fabrics, all with peach and orange, touches of blue and brown as well. I really like to make dolls that aren't too obviously intended for girls or boys, at least when it comes to Stuffies. I want the owner to be able to decide on their own name and gender of the doll, and I want them to appeal to all children, since they are meant for gentle play.


 I cut out my fabrics, I have alternating prints on the arms, legs, and ears, so that they are one print facing front, and an alternate on the back. It means watching carefully so that when I switch the pattern pieces to make the matching arms and legs, that I cut them the right way. I used my new sewing machine to sew this project, my first time using the machine almost exclusively, it was really challenging to work on the small curves, I need to learn what plate to use under the fabric, I think the fabric would be easier to manipulate on the darning plate as opposed to one with feet that grab it. It does save time though, which is wonderful.


 After hand drawing the face onto the bunny [for some reason I omitted the classic buck-teeth, oh well] I used embroidery thread to stitch it into place. With curved faces, I always opt for a plain stitch, since it looks neater. My recent acquisition of pinking shears [yay!], means that I can really make the edges of the circle faces look sweet.


 I hand embroidered the face in place fully, and choose two beautiful mismatched light blue buttons to give it a lot of character.I think this face is absolutely adorable, one of the best I have done yet.  I then made my Bunny Boo's tail, this was a technique I have been dying to try. I made a fabric Yo-yo out of a peachy fabric, then added a tiny bit of PolyFil stuffing to the cavity inside to make a bit of a puffy tail. I think it turned out nicely for my first Yo-yo.


 I stuffed all my limbs and ears next, then I then got ready to sew all the elements in place. I started by re-tracing my template in disappearing fabric pen on the wrong side of my body pieces.  I sewed the tail in place on the back, the put right side together and pinned in all my limbs and the ears.  I ran the whole thing through the sewing machine, trying to ensure that all the parts were well sewn into the body. I was mostly successful, although one ear wasn't fully secured so it required some hand-finishing.


 I like the bent Bunny Boo ear, it gives it a little more Wonky character, which is my thing, and it looks funny.  I left enough room on the right side of the doll, from under the ear to above the arm to turn the whole doll out.  All those stuffed pieces and the firm face fabric make for a difficult turn out. I was mostly pleased with how the doll looked pre-stuffing.


In these pictures, you can see how the alternating prints went down on the arms and legs, and you can also see the puffy tail that I secured into place by hand. I think the patterns work nicely together.


 The final steps are of course stuffing up the body cavity. It took a lot of PolyFil to fill this fellow, it is a much bigger body then I have done before. I need to be conscious of this fact when designing patterns, because I really need to make sure I have enough supplies on hand to complete the projects I start.


 My completed "Peachie" Bunny Boo, sitting atop my current storage system, several reusable shopping totes and random cardboard boxes. At some point I will have to organize my crafting space to better store my materials, not only because I want it to look neater, but I want to be able to find what I need when I need it. Hopefully my niece, my brother's daughter, will like her bunny, as she is the intended owner of this sweet Stuffie.  Onward and upward.

Tuesday, February 14

It's Time To See Polle


When my nephew saw my original Rag-Bot design, he told me that he wanted one too. How can I resist a request from my "schmoopie". Of course, being the one kiddo that has learned how adaptable 'art' can be, he ordered up a few modifications to the original design.


I started with my base template, and this time I was really interested to see how different the process would be using a sewing machine. I was able to get a good deal on a basic Singer machine, so I decided to go for it even though I hadn't used a sewing machine since I was 12 years old. Let's just say that the learning curve is pretty darn steep.


My nephew chose all his fabrics and how he wanted me to use them, as in front and back, of the limbs, and the body. He wanted a fairly large printed 'Aliens' poly-cotton blend print for the body, so I tried to get a good piece of the fabric so that you could see some of the design on the back at least. Arms and legs were to be two-patterned, with opposites on the arms vs. the legs.  The antennae was to be in a black 'Space' print that seemed to match well.


I created the basic white face panel as I always do on a piece of white flannel, and I stiffened it with the liquid product and let it dry. I drew the face on in pencil first, marking eye placement, and then drawing the smile in a permanent black marker.


An addition to the design that was a 'must', according to my nephew, was adding 'ears' to my pattern. I created them by sewing a half moon shape on a red print, then by turning the half-circle right sides out and  basically just rough stitching them into a folded ear shape.


After managing to sort out some problems with a jammed needle and thread breaking on my machine, I was able to stitch up all the pieces, including the altered antennae, which has a 'round' shape as opposed to the 'Y' shape of the original version.  It looks mostly octagonal, since it was my first time trying to sew a round seam on the machine, but I think it still works just fine. I turned the pieces so out so that the right sides were out, and I stuffed them all, with the exception of the ears, which I wanted to leave "floppy". I pinned the pieces where they were to be sewn into the main body.  [Yes, my tape measure has a little pig on it, I am a sucker for cute]


After figuring out how to adjust the stitch size and tension to account for a thicker fabric, I was able to sew the face patch onto the head of the doll.  I used white poly-cotton blend thread, so the stitches disappear. I also secured the  buttons for the eyes in place with the same thread, making sure they were well anchored.


 Next I used a black embroidery floss to stitch over the drawn on mouth, to give it a 3D effect, and add a more hand finished look. I also opted for a basic stitch and framed the panel in, since I used a pinking shear to finish the edges.  Normally I use an 'X' stitch, but with the jagged edge, the detail would have gotten lost.  I went on to reinforce the eyes with the black embroidery floss as well.


After pinning all the limbs, etc. into place with like sides together, and all the 'parts' on the inside, I used the machine to stitch around the edge of the doll.  I left a bottom corner open, and carefully pulled out one limb at a time, and then turned the entire doll right side out.


As you can see, all the limbs and the ears, antennae, etc. are sewn in place. The machine really did a nice job reinforcing all the limbs. I opted to secure only the antennae and ears with extra stitching in black embroidery floss to reinforce the shape of the ear and give added support to the heavy antennae. The stuffing opening is on the bottom right side. I had my nephew help stuff this fellow up, giving him the opportunity to choose how 'firm' or 'soft' he liked it. 


The finished doll, named "Polle" by my nephew. I asked him how to spell it, and he said P-O-L-L-E, which rhymes with Roley Poly of course.  I love letting him name his own dolls, it's really fun to give him as much ownership as possible in the process.


Here is Polle and his new owner, my 6 year old nephew, who was at this point of the evening was very tired and not too thrilled with posing for the camera.  This was the only 'natural' face I could get from him, the rest of the pictures made him look like Pee-Wee-Herman on a sugar high.


Polle appears to like hanging out in the rungs of the stairs, he is a good playable size, big enough to be cuddled, but small enough for travel. My next few Stuffies will likely be up for sale in my Etsy shop, so I better get sewing.

Sunday, February 5

Just A Little Rag-bot of Love


My latest creation is named "Rag-bot", for Robot Rag Doll, and I think it is just adorable if I do say so myself.  I started this doll making process differently than I have in other projects. I wanted to be a bit more practical with the planning, and so I drew up an image of the doll I wanted to create. I chose to go with four fabric choices, all in shades of purple, black, and white.  After I had a basic image for the doll, as you can see on the paper above, I wanted to be smart with my fabric selections, so I numbered my fabrics 1-4, and then decided which I would use for the front/back of each body part.  For example, you can see that the leg is 2/3. That means for me that I am placing fabric 2 on the front and 3 on the back of the legs.


Next I got a spare piece of cardboard from the recycle pile and drew up a template for the doll. I wanted the head to be a bit larger than the body, so I found objects about the size I wanted to use and traced them out. I don't have a straight edge ruler, just measuring tapes, so I was working without exact measurements. For me that was fine, none of my other dolls have had any measurements at all.  I planned a size for the face shape, then made a second templete for that, since I like to do my faces on stiffened white flannel so I can stitch and paint on details, and sew buttons on to a more secure background.
 

Even though I had originally planned on making a spiral form 'antennae' for Rag-bot, I opted for a Y-shaped style instead, since I wanted to play with angles and I also love the retro "rabbit ears" look. I chose different colours and sizes of buttons for the eyes, since I wanted it to look more like it had gears for eyes, and after drawing on the mouth, I went over it with black embroidery floss. The cheeks are actually painted on in acrylic paints, just small circles in a matching lavender shade.


This image shows the fabric choices for the back, I really love using the zebra-print chintz here, it is so darn cute. This one is likely heading out in the mail to my eldest niece.  What is nice about this particular doll is that both boys and girls, and adults of all ages, will like it.  Any alterations I make would have to do with maybe adding a weighted 'bean' section to the bottom so it can shelf-sit nicely. This doll can be endlessly customized in colours and patterns, using from 1 to 12 pieces of fabric, and makes great use of small scraps and left over remnants. The ribbon bow gives it just a little more polish, so I need to find more ribbon for future projects. I have already been asked to make more of these, so maybe this is one for the Etsy Shop when I open it.

Thursday, February 2

Making Faces

I have two projects in the works right now. One is a new "Stuffie" for which I actually created "gasp" a drawing and a cardboard template [see, I am learning]. My other project is going to be my first OOAK Art Doll. As a novice doll maker, and seamstress, with no sewing machine, I have to make the entire doll part by part through trial and error. This includes clothing. So it may take some time until I manage it.


I started by cutting a panel of white flannel and tacking it down to a spare bit of cardboard. I drew the face in pencil in my own style, loosely placing all the features, then I went over that in vanishing purple fabric pen.   I pulled out a set of basic acrylic paints and a brush and began to work on the fabric, which is difficult because it is not a flat finish.  I painted the whites of the eyes and the irises first, then added the pupils in black and some white highlights. I developed a myriad palette of flesh tones and began to build on the features. In the first image I was very pleased with the forehead, but the lips and eyes needed work.


I continued to work on the face, actually not able to put it away, and added thin brown lines to highlight features. I had planned on doing eyelashes in pen or paint, but I am rethinking that step. The eyes came out smokier than I had planned, the brows more arched, but otherwise I think it is a good start, considering these are poor quality materials [all my good stuff is with my nephew].  The images are very dark, but the original is quite nice and the shading is complex.  I am planning on using a hand-spun wool roving to make the hair, but the body will be madke from the flannel, which means I will have to paint the hands perhaps.  We shall see.

Those Tricky Consignments

Wanzie the Alien Stuffie, Custom Consignment.
Wanzie, my first Custom Consignment job came by way of my 6 year old nephew who adores anything creative and hand-made. When he learned I was making dolls, he asked if we could make one together.  I, of course, was happy to encourage him and on my way over to visit with him I asked him to draw a picture of the "Stuffie" that he wanted me to make.  As you can see, he choose a sort of Alien Monster, it is the cut-out drawing on red scrap paper.  


 I was presented with this drawing upon my arrival at the "client's" home, and sat down with him over Timbits and Hot Cocoa to discuss the design in more detail. You can see the 'order sheet' below. We got into specifics very quickly, I handed him my scrap fabric bundle and he chose his favorites.  I also let him choose the buttons for his single eye. It is this single eye that had his mother, my twin sister, suggesting the name one-zie, which I took some artistic liscence and converted to Wanzie.


His Order - Very Specific. One Eye (He choose the buttons), Two Arms (3 fingers on each hand), Two Antennae (One curly, one straight), 3 Legs, and a smile like so. [I wrote it down to be sure I had it correct, I am very professional this way]


Fabric - The client choose all his fabrics for each body part, I drew a pattern out by hand and began working.


Check - Two arms, three fingers on each hand... two antennae as specified. Face drawn and blush the color the client ordered.


Legs - 3. The final appendages built and stuffed, now on to the body.


This time, I decided not to cut out a window for the face, and instead used it like an applique to the front panel. I stitched the face in place with white thread.


I then followed my order form and added "those x things" around the face and stitched on the double button eye.


You can see that my stitches are all done by hand, of course, but they are becoming far more even and neat. After pinning the outward facing side together, I started full construction of the body. This was particularly challenging as I had to sew all the appendages in place "inside" the body as I went. I was wondering if they would make it once I turned the doll out.


We have the body! All limbs secured and stitched into place, an opening left for the stuffing. I have to say, Wanzie is a pretty cute little fella.


hose three little legs make me giggle. They look like little grey sausages. At least with the single fabric and pattern on both sides I was able to make use of the folded edge to form the bottom of the foot.


Wanzie stuffed and sealed and ready for the final touches. It is difficult to know how much stuffing is 'enough'.  This doll is going to see some handling, unlike an art doll, so I used a Poly-fil throughout. I wanted to double secure the limbs in place, so I decided to do the "X" stitch along all the joints in cotton embroidery floss.


"X" Stitches added to double secure all the limbs to the body. We now compare the finished 'Stuffie' to the original picture.


One eye... Check! The arms look like "asparagus" according to my sister. I tend to agree but my nephew thinks they are just perfect.


Done! To Be Delivered to the customer ASAP. He is currently at home with a tummy bug and fever. I think Wanzie will make him feel better. This was a really fun project and he is so much cuter in person. The camera on my BlackBerry doesn't do it justice, but you get the general idea. I am already hard at work on my next dolls. I have two in the works, very different designs, but I will share those soon.